I have heard from quite a few people that they really enjoyed making No Waste Geese from step 1, either for the first time, or using the method once again. I love it because there are no triangles to trim off and guiltily toss. If you're like me, you save them to sew back together for another project (but sometimes they languish). With this quick method there's just a little trim for each geese unit. Now that I think about it, I should have used the eight-at-a-time method for the HSTs....file that away for the next pattern! (which has been tech-edited as you read this, and awaits me looking it over)
Eleanor Burns devised the No Waste Flying Geese. I love her work and her attitude and sense of humour. I had the pleasure of attending Benartex's virtual Fabric Show this past week, and she was there! As bright and funny as ever. Her latest line is Judy's Bloom, out in fabric shops right now. I had another pleasure: I was asked if I wanted to make a project to showcase her line, and of course I said yes! You can view the post here, and see the quilted tote bag I made, and enter the giveaway. I've used it already to take to yoga and got compliments on it. So spring-like!

Back to this project! Let's sew some Pop Star centre units!
Just a reminder that the baby quilt sizes come first with the throw in parentheses following. Refer to the Pop Star QAL graphic for colour reference purposes. The large star is turquoise, the pop stars are navy, and the BG (background) is white.
These Pop Star centre units actually float on the large star points
You will need to gather together the following pieces: two 2 1/2" x 4 1/2" (3 1/2" x 6 1/2") turquoise (large star) rectangles, two turquoise/navy flying geese, two HSTs, and two 2 1/2" (3 1/2") BG squares. Sew these together into the two units shown below. Pay close attention to the orientation of the pop star points and the HSTs. They will be mirror images of each other. Press the seams to the green rectangles, and the rest as you prefer.
 |
| Aren't these fabrics glorious?! |
Sew these two units on either side of a 4 1/2" (6 1/2") navy square to make the centre section of a pop star unit. Press the seams towards the navy square. This section should measure 16 1/2" x 4 1/2" (24 1/2" x 6 1/2").

Sew two 2 1/2" x 6 1/2" (3 1/2" x 9 1/2") turquoise rectangles on either side of a turquoise/BG flying geese, pressing to the rectangles. Attach this unit to the bottom of centre section you just made.
Sew two HSTs on either side of a 2 1/2" x 12 1/2" (3 1/2" x 18 1/2") BG rectangle, paying attention to orientation of the HSTs. Press to the rectangle. Sew this unit to the top of the centre section.
Make four of these 16 1/2" x 8 1/2" (24 1/2" x 12 1/2") pop star centre units. What you actually have made in this step are the eight large star points, with half of a pop star floating over the star point pairs.
I said I might have a wee prize for one of the people who linked up at last week's blog post or within the hashtag on Instagram. There are ten quilters' posts in the hashtag besides mine. There were seven linkups in the linky last week. I know not everyone who is sewing got a chance to post their progress (I can think of three off the top of my head) but there is still the big linky at the end, and keep posting in the #popstarquiltalong on Instagram or email me a photo and I'll do it for you. I lined up the ten in the hashtag in chronological order followed by the seven links from my blog post and got MacGyver to choose a number between 1 and 17. He chose 14 which is....
Gale Bulkley!

I'll be sending Gale this yard of "Evelyn's Etched Tulips" which is the line I used for the Baby Pop Star.
This week I'm featuring two more sponsors for the QAL.

I first met Lisa at Love to Color My World when Bernie of Needle & Foot hosted a blog hop showcasing upcoming fall fabric collections. Lisa was the contact for the fabrics for Paintbrush Studio. She also was the editor of Benartex's online magazine, Modern by the Yard. I submitted a design which she accepted for publication, On the Plus Side. Lisa has had her modern vibrant designs published in several magazines, and she designs for Benartex as well as Paintbrush Studio. Her Etsy shop is here.
Cheryl of Meadow Mist Designs was the winner in my first-ever giveaway on my blog. I remember emailing her to let her know she'd won, and she was at her first Quilt Con. So we go back a little ways! I love her design style, and I've bought, and I've won, several of her patterns. She is an accomplished designer, an author of two quilt books, and these days she doesn't just attend Quilt Con; she teaches there. Her quilt shop is here.
Happy sewing this week! If you want to purchase a copy of Pop Star because you cannot wait for the next two week's worth of instructions you can get it in my Etsy shop SandraJaneQuilts.
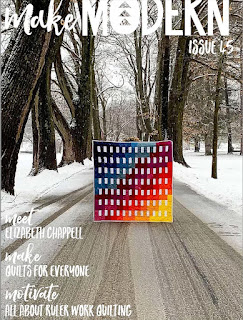
One last note: I am a happy long-time subscriber to Make Modern (affiliate link), and I've had two designs published in their magazine. Did you know that if you purchase the current issue, #45, they are sending 30% of the sales to the floods relief of Australia and the Red Cross in support of Ukraine? Today is the last day of April, so if you haven't got this issue, where you'll find ten quilt patterns and 12 quilt-related articles, all for just $12AU, then hop on over to the site and snag your copy!
Congratulations to the winner. This is such a nice pattern and I am enjoying the pace.
ReplyDeleteIt is the perfect amount of sewing each week!
ReplyDeleteGot started on these units this afternoon, and they're going together so nicely! It's so great to have all the HSTs and geese made already. Thanks, Sandra!
ReplyDelete