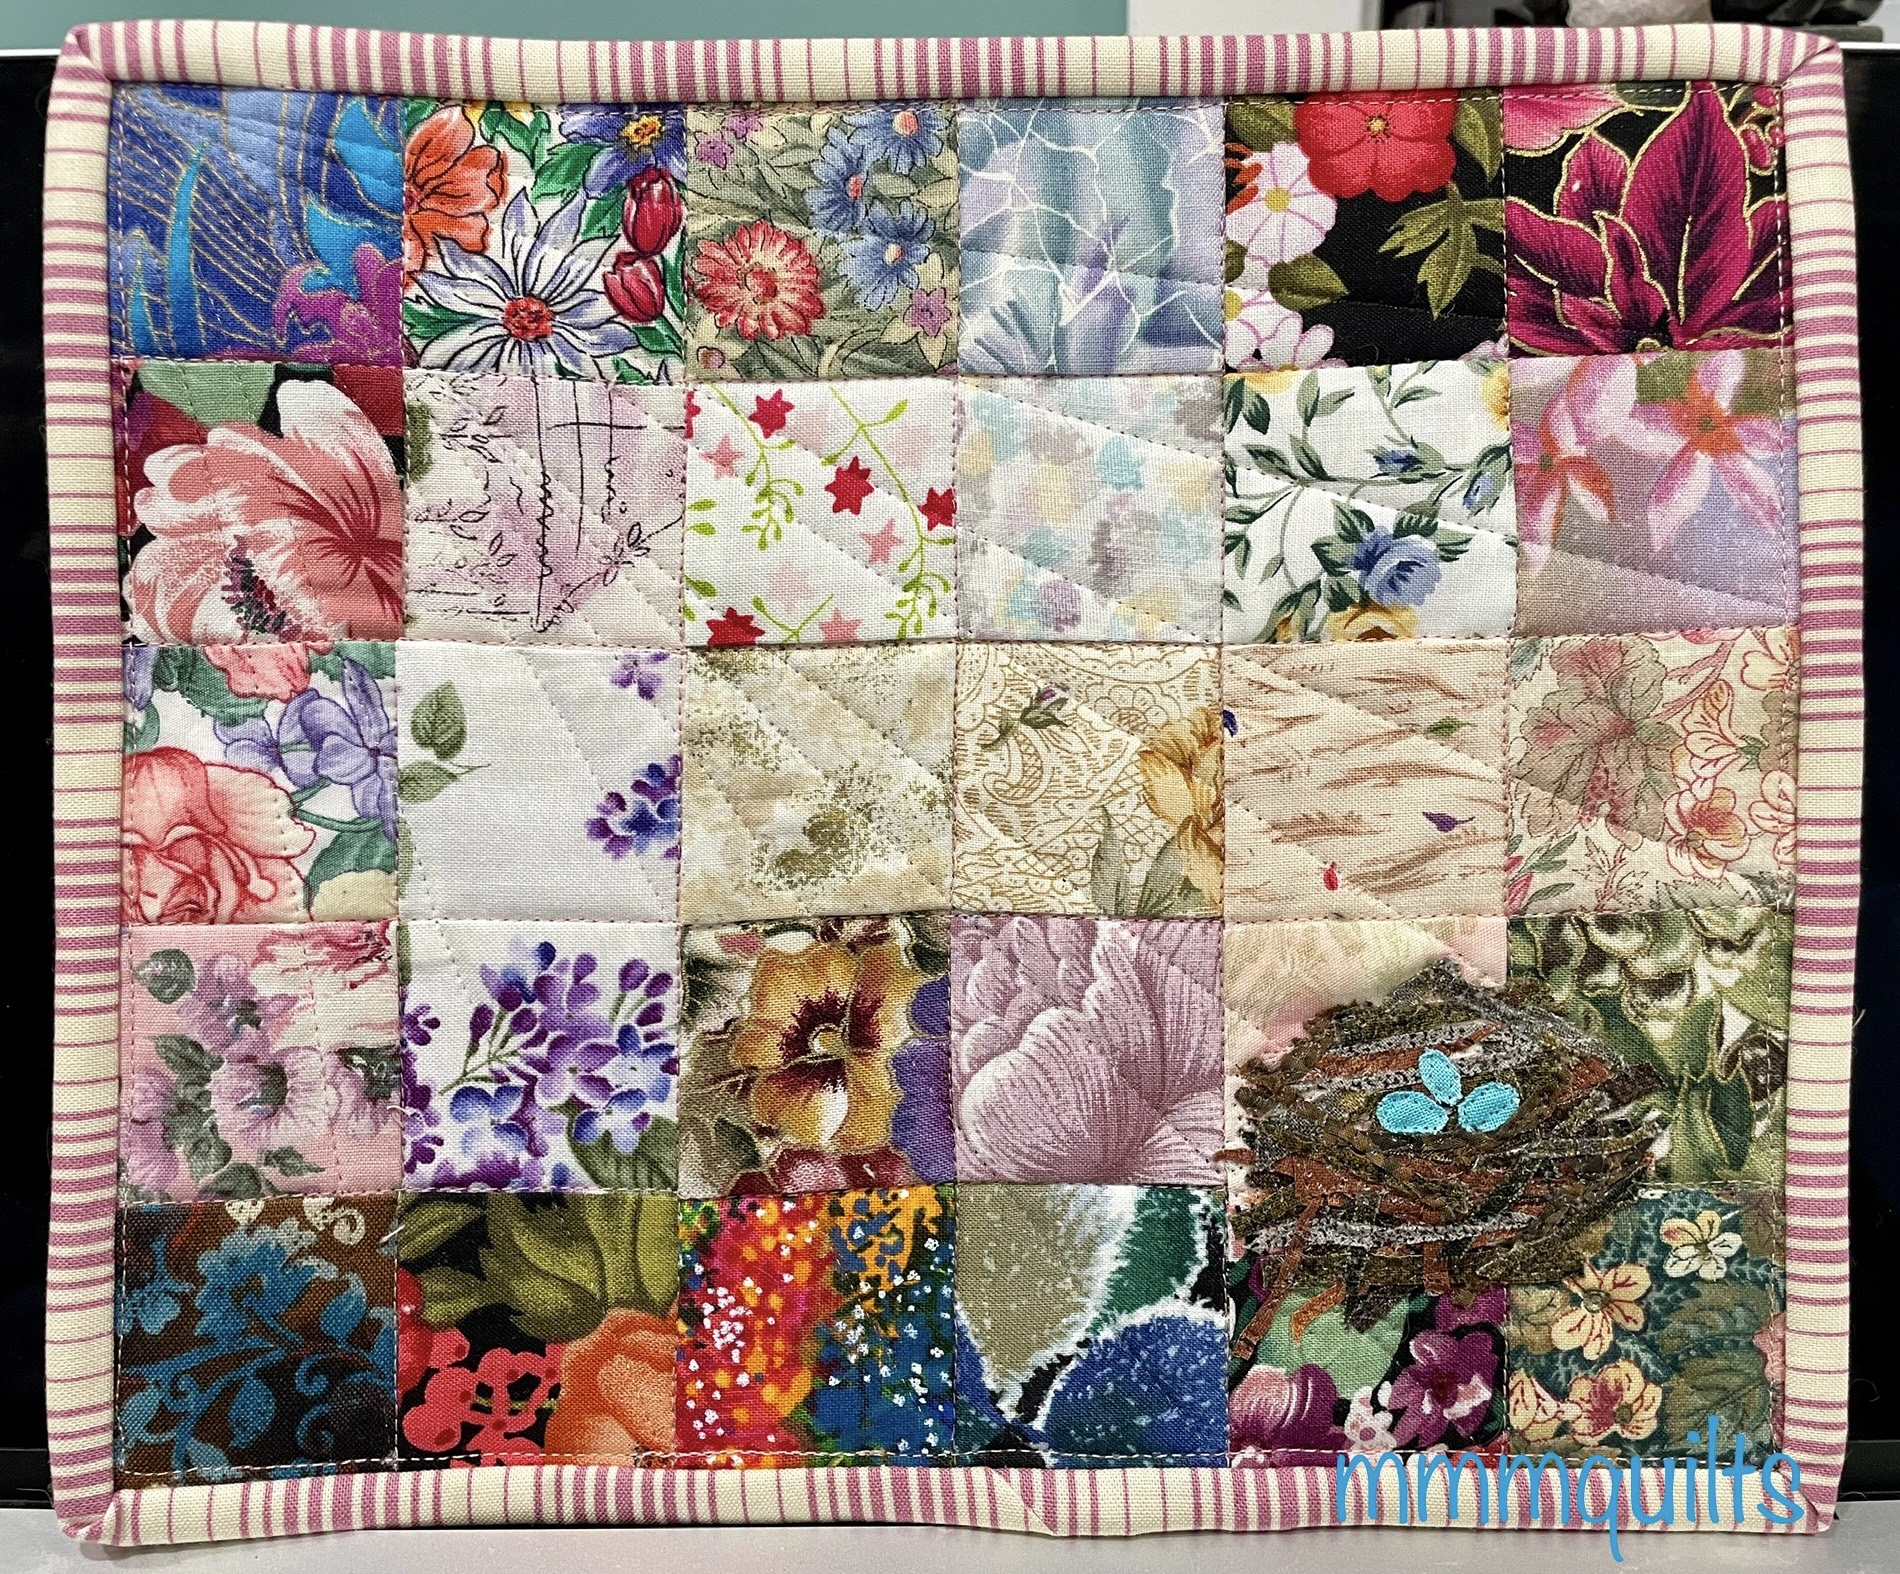
What a fun way to end this year’s challenge: with a small joy-inducing project. This week Trish asked us to make something that we could hold in one hand, "small in stature, but full of joy." I've had this image in my head for the past several weeks, wanting to work it somehow into a quilt.
I made a mug rug with the symbol for female on it.
I am always excited to kick off the year with challenges to my creative spirit. Project Quilting, along with the Stay At Home Round Robin, aka SAHRR, which starts this coming weekend, do just that!
Our first challenge is to make something that evokes "the myriad places a bird calls 'home,'" as explained by Trish at kimlapacek.com Here is my finished piece. Read on to see how it evolved.
After quilting for some 25 years, there isn't anything in quilting that I fear. Avoid/hesitate? Yes. As in life, there are certain things we love to do, and certain things we ... do not! Over the course of the first couple of days following the release of the challenge, an idea was forming, to symbolize fear in a mini quilt, from the debilitating 'darkness' of feeling fear to the release, the blossoming and lightness that happens when you work through it and have such a sense of accomplishment. I wish I'd had more time. I had another deadline, the SAHRR, and so I devoted the majority of my week to that, since Cuba had 'robbed me' 😉 of a week's work on it. In the end, I pulled this together in a few hours. I do love it, and have used it every day since Sunday!
Happy Galentine's Day! This is my first challenge, and project post as a new ambassador this year for Island Batik, and I am very excited to show you what I did with supplies they, along with Aurifil and Hobbs Batting provided.
Galentine's Day, for those of you who may be unfamiliar with this newer day of celebration is when we celebrate our girlfriends, aka gal pals. I am blessed with many good women friends, IRL, in QBL and in crossover land between those two! I made two mug rugs because it doesn't take much more time to make two as to make one, and I am giving these to two very deserving amazing women.
Here is what I started with, a fat quarter bundle of 5 red, pink and off-white fabrics from Island Batik.
This is what I made, which I'm calling 'Hugs and Kisses'!
Aurifil 2455 on the red/pink areas, Sulky Blendables 733-4049 in the background
I designed this last year as a gift for another good friend, Jasmine, which you can read about here, calling it Quilt Kisses, which is à propos for the mug rug, but also because that's the name of her blog. I thought it would be great to make again for the challenge. It measures 6.5X12.5" and would make a great mug rug, a mini for your mini wall, or a candle mat. It's great for practising some FMQ too, since the piece is very maneuverable.
The backs. My favourite in the FQ pack is that top pink, berry, purple and magenta batik. In the bobbin I used a red Isacord polyester which worked beautifully with the Aurifil magenta on top, and an Aurifil pale yellow, 2123, which I already had, to go with the Sulky Blendables.
I had the perfect spool of Aurifil thread in my Island Batik package. I used it to walking foot quilt the heart and the X.
I did straight-line walking foot quilting in the red/pink areas and a tiny flower or perhaps butterfly 😉meander in the background. How I love this background fabric!
Want to make one? They're pretty quick, with a slick method I thought of myself (ha!) to avoid 6 small HSTs. If you'd like a free PDF of these instructions, click here. (affiliate link).
Materials for One Mug Rug
scraps or fat quarters of pinks and reds and a light for the background; batting scrap approximately 8X14"
backing scrap approximately 8X14"
single-fold binding strip 1.25"X 45"
Cutting
For the heart block
From pinks and reds, cut
26 squares @ 1.5"
Two squares @ 2.5"
From background cut two squares @ 2.5" and one square @ 4" cut once on the diagonal
For the X block
From the pinks and reds cut:
Six squares 2.5"
Four squares 2"
Six squares 2.5" background
Heart Block Construction
Place your 26 squares on your design wall in a pleasing pattern. I actually did not overthink this at all; just wanted a random placement.
To make the 2" HSTs, layer a 2.5" background square with a 2.5" red square, marking a diagonal line on the wrong side of one of the squares. Sew 1/4" either side of the line. Cut on the drawn line, press open and square to 2". Make 4. Place them on the design wall in the top row as shown below.
Piece the heart, either in rows or in columns, which I prefer as it keeps everything chained together in order. For more on that method, called Book It! go here. I use it all the time, large quilts and small, have showed many others the method too, and are they impressed. I learned it years ago in a colourwash class.
To get the background corners on the heart, lie a ruler with a 45° line on it on the reverse side of the block as shown below:
The 45° line is along either a seam line or a stitching line, and the 1/4" line at your cutting edge is on the seam line. The ensures the cutting edge is 1/4" to the right of that stitching line so you will have your seam allowance. Cut. Repeat on the other side.
You will have a heart that looks like the one on the left. Now place a 4" HST you cut out right sides together, on one side of the heart. I like to fold the HST in half to find the mid point, and do the same with the heart cut edge to line things up perfectly. Then I like to sew with the heart facing up so that I can sew right through the seam intersections. Sew both sides. You will then have the block on the right. Trim to 6.5". Note that the 4" squares you cut are a bit oversize so you can trim to a perfect 6.5" size.
Kiss or X Block Construction
Piece the 6 HSTs, layering a red/pink/magenta square atop a background square, as you did for the heart small HSTs. Tip: I pressed half of the seams to the background and the other half to the colour so that they will nest nicely when within the block.
Lay out the block on your design wall.
Here you can see I've already chain-pieced the left column as per the Book It! method. Press. Now sew the X block to the heart block.
If you are making two you will have:
Layer the mug rug. I did one with scraps of cotton batting (no clue what it was) and the other with Thermore, the super-thin 100% polyester batting we were given from Hobbs Batting. Whoa!! Is it good for minis.💖
This is the one with the cotton batting, slightly more poofy than the Thermore.
I debated for a while on what to do in the background, more lines or a flowing design for contrast. I hit upon the little flower meander because it can be quilted small, it's sweet, and it echoes the butterflies in this lovely fabric. The Sulky Blendables 30 weight was just perfect to use, soft yellow, cream, peach, pink and pale green!
The four threads I used for quilting and top-stitching the binding down.
As I said, I switched from the red Isacord to the pale yellow Aurifil in the bobbin. I tried, but even with tension adjustments, I still got some 'pokies' on the back, or sometimes on the front, and we can't have that! I used a Topstitch 90/14 Schmetz needle and backed the tension off quite low, and then FMQ-ed away. These two threads played very well together, and the pale yellow on the red or magenta backs is not bothersome IMHO.
Bind with a 1.25" wide single-fold binding. I like to do that because it's finer on a mini, but with limited amounts of fabric, it also means half as much is needed. I stitched it to the back and top-stitched it down on the front with the magenta. It sure blends lovely with all the shades of red doesn't it?
Let me know if you decide to make one, as I'd love to see it! If you'd like a free download of these instructions in PDF form go to my Crafsty store (affiliate link).
Quilt Stats:
Pattern: original design
Size: 6.5X12.5"
Fabric: Island Batik batiks
Batting: Thermore by Hobbs Batting in one; unknown cotton scraps in the second
Quilted: on my Bernina
Threads: pieced with Gütermann cotton; quilted with Aurifil 50 wt and Sulky Blendables 30 wt, Isacord polyester and Aurifil in the bobbin
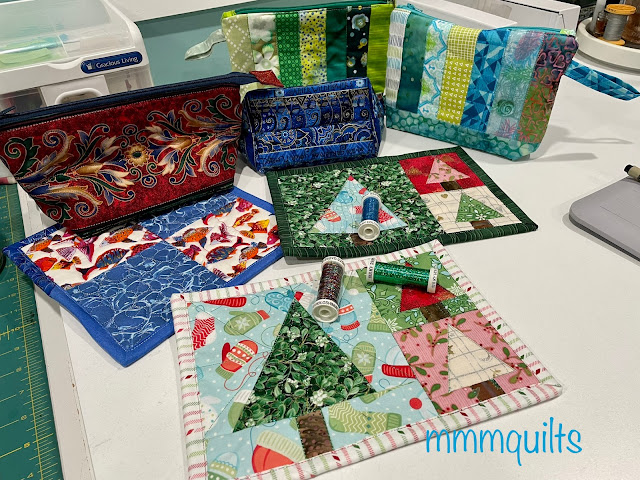
Pink and Mint are the new Christmas Red and Green. I couldn't be happier. Don't get me wrong: red and green and gold as well are still right up there in my Christmas colours cupboard, but there is something about this combo, with a little silver bling for a punch, that I love.
I showed you the flimsy that was a near-fail a few weeks ago. I'd not followed my own tutorial instructions closely enough, and had incorrectly oriented the large tree blocks. The mug rug would have been rather tall and skinny as opposed to a nice rectangle. However, all was not lost as I had the idea to add the sashing strips as a frame, and voilà! A new spin on my Leaning Tree mug rug. You can find the original tutorial here.
Both of these have been given away (it feels awkward in my lingo to say 'have been gifted'), one to one of my yoga students who knitted me a pair of yoga socks (they're da bomb), and the other to a person who reads this blog, so mum's the word until they arrive. The pink and mint poinsettia fabric is an old, er, vintage one from Hoffman that I love, not much left of it now. The other pinks and mints and the burgundy are leftovers and scraps from other projects. Wait, the crystal-looking green one used as sashing and binding in the top mug rug is a fat quarter from JoAnn that I picked up a couple of years ago.
These mogul pines make a very Christmassy backdrop don't they? This was pre-snowmageddon a week ago. You'd never know it today though; it's nearly all gone. Used my mmm! quilts labels from Ikaprint of course. No affiliation (but buy through Lorna of Sew Fresh Quilts, as I did, if you wish to support a blogger), great labels and great service.
I used Sulky Holoshimmer threads again to quilt these with both my walking foot and free-motion foot for FMQ. It's so difficult to show off the sparkle of this thread which is flat like a ribbon.
I laid them on the grass to catch the later afternoon sun and so this does give you a better idea.
Two tips when sewing with this thread: 1) use a Metallica needle (I like Schmetz) and, 2) feed the spool horizontally, set up away from your machine.
I set mine in a former candle holder jar, using a knitting needle on which I feed the spool, like a toilet roll holder. Then I feed the thread up and over my stand-alone thread guide, keeping it flat the entire time, and from there into the machine. Tip #3, shoo the cat away. Repeat if necessary. 😼
Here's an inside, 'working' photo!
You also see the shimmer of the thread in this photo too, and that they are rectangular, not wavy, lol and lie flat!
Do you notice the beach glass in the vase at the top of that photo? Well I put some more to work, making another bowl. I'll write more about the process in another post. This one is quite large, 9.5" diameter but only 2 3/8" high.
Below, it was nearing completion. I love the various shades of the beach glass, white, several shades of seafoam, mint, light pinkish/purplish, green, and very rarely, brown.
You use another bowl for the mold. This one I tried what my friend Elaine suggested, Press 'n Seal. I was trying to avoid the creases I got when I used Saran wrap on the first one. It did go quite a bit smoother, but the bowl was larger and not as sharply slanted too. However, I got the imprint including words and dimples(!) off the Press 'n Seal. I'm sure it will come out with the Dremel. I must say these are rather addictive, like a jigsaw puzzle!
While I was in Florida, MacGyver did the tiling for the backsplash.
He did such a nice job! All the grout is done now. He put spray foam between the window and frame to seal it up (previous owner had this one installed and it was um a tad drafty) and then he'll put up the casing. He's building some shelves of reclaimed barn wood on the sink wall, once he does some recon to find the wood he wants. Pretty soon I'll give you the before and after final tour of the kitchen.
Mug Rug Stats:
Pattern: Leaning Tree mug rug (my own design- link is in this post)
Size: approximately 6.5X9"
Fabric: scraps and stash
Batting: scraps of Warm 'n Natural or maybe Pellon Nature's Touch
Quilted: on my Bernina
Threads: pieced with Gütermann cotton; quilted with Sulky Holoshimmer in pink 145-6054 and green 145-6018
That's a great song written by Leonard Cohen. My favourite rendition is by kd lang. Both great Canadians. :-) I may have uttered that phrase, or at least heard the choir sing it, a couple of times over the past few days. I showed you on Instagram this little dish I made from beach glass I've been collecting on the shore of Lake Erie at Seacliff Beach, close to my home.
It looks so pretty in the sunshine! It really is that pretty.
I am fascinated by beach glass, but until rediscovering this beach this summer, I had not had much success at finding it. A few friends that also know of the beach's plentiful treasures think it's the way the currents flow around there that tosses loads of beach glass and a fair amount of lucky stones on the shore. Lake Erie was, sadly, quite the garbage dump on both country's sides, for decades upon decades.
Just yesterday, the wind was gentle, the temperatures quite lovely, though not as fabulous as Wednesday when we soared to 19C/66F! However, that day the wind was shrieking, so not great for a walk on the beach. We remedied that yesterday:
Leamington, Ontario -- can you say 'ahhh...' -- ya thought you could
On a dog walk, it isn't as leisurely to keep stopping to pick up bits and bobs that one finds; however, I still managed to snag this treasure trove within a half hour:
Trust me I ignored a ton of pieces. That's the most greens I've found yet in one stroll! The teaspoon is there so you see the size of the pieces and of the dish. I just love the sugary coating the glass gets after years of being tossed around in the sands and water. Some pieces actually have grains of sand embedded in them. Yesterday I found those five pieces of pottery, worn smooth, but no designs visible on them, as we have found before.
And YESSS!! One lucky stone more for my collection, this one, another J, quite faint (I nearly tossed it back thinking na, it's just a stone). But no, got home, had a closer look, and yup, definitely a lucky stone. You can read more about them in this post, but they are the basically the otolith, or ear bones of a sheepshead fish. These bones are particularly plentiful in Lake Erie, and have been found in ancient burial sites, so they were clearly prized then too.
So how did I make that little dish?
I found this tutorial by Debi's Design Diary on Youtube.
The girl is a hoot, and I love that she shows you her first epic fail attempt, and then gives you some tips. I used a lot of glue, as she advised, Elmer's School Glue, but found that too much is not good; the glass pieces slid around, which gave me the kind of lip or angle you see at the top. At first I was disappointed, thinking it would look dumb, but I really like the kind of curve that was inadvertently created! Also, the glass pieces are heavier than you think, and with too much glue, they don't stack, they slide around. I found that I was better off doing a few rows at a time, waiting a few days (I know, it takes forever to dry) and then adding a couple more. Below you see it after two weeks or so of building, drying, building some more, and finally taken off the original dish I used for a mold.
Another tip is in the wrapping of the dish you use as a mold. I wrapped it with Saran wrap as she says, but on my next one, I'd like to smooth out the Saran wrap on the sides of the dish somehow because the glue followed the folds of the wrap and created a bit of a crease-like effect inside the finished glass dish.
Here's a look at the creases:
If you look closely, you can see a bit of a whitish line where the glue followed the crease line. This was only a day or two after I put the final row of glass pieces at the lower edge of the side. Where the glue is white and not clear is where I'd set in my final pieces.
Saran wrap all removed. So pretty! Notice the bits of dried glue around the top edge.
Elmer's School Glue is the main glue I used but MacGyver also had some Weldbond I used when I was just about out of Elmer's. It dried faster, just as clear, and I think is even stronger. Debi suggests using a Dremel to smooth out the top edge and remove any chunks or lines (as in those creases) of glue. So MacGyver got out his handy dandy Dremel and went to work. The first brush didn't do much of anything, so he went to a brass wire one. For future note, stay with the brass. It still wasn't removing the glue bits like he wanted, so he went to a stainless steel wire one, and that made black marks as it took off the glue. 😞 He tried to remedy it, but it made the marks darker, sniff. Oh well, this dish will be used as a candle holder, so not to worry, as the marks are inside.
Tried to find a darkish spot in the house on a sunny afternoon, so the bathroom shelf it is! Flameless votive inside. I love it!
All in all as a first attempt, and nearly an epic fail after the first few hours, I am super-happy with this! And the fact that it is made with garbage or trash found on a beach, each piece with its own story to tell, makes it that much more special.
Another near fail this week was this mug rug.
I did not pay close attention to my own instructions for the Leaning Tree mug rugs...doh! The big tree should be oriented with the wider edge at the bottom. Therefore my tree was too tall and not wide enough. Sigh. I'd already cut the pieces for the mini trees, so how could I salvage the big trees? No trunk? Hmmm, a possibility, but they wouldn't match the mini trees. then I thought of putting in the frames so the mini trees would equal the big tree height. But then the mug rug was too narrow, so I added the frame between the big tree and mini trees section. Yes! It works! "Hallelujah!" this time of the Handel Messiah kind!
I love these soft pink and mint colours together; reminds me of candy ice cream we used to get at Christmas...do they still make it? The best was Lucerne's my mum bought at Safeway. Yum! I can totally taste it just thinking of it. Once I quilt these, I'll post the finish. Ha! I only just now see I should've paid better attention to the mint doves fabric when used as the background; the doves sure are doing some trick flying!
My third topic is a bit of a fail. Sadly I do not have my OMG One Monthly Goal, finished, the flimsy for the 150 Canadian Women quilt. Sniff! I do have all 150 of the 1.5" X 6.5" sashing pieces sewn to each block, and I did find the most perfect fabric to use as the cornerstones, which I showed you in the DrEAMi! post just before this one. Ah well, two out of three 'ain't bad', right?!
I was super-excited to get to work with Amanda Murphy's fabric line "Meadow Dance" last month (heard in her newsletter today that it is sold out and being reprinted!) and then... to get to work with her next line, 'Winter Games' in my new favourite Christmas colours? Over the moon!
Isn't that such a perfect winter print? There was no question that that was one I'd pick for using in my mug rug. Mittens with strings, how I always wanted a pair, thought it was so cool that you could just let them dangle, and even toques, which, as I said on Sew In Love With Fabric blog, rhymes with 'Luke' and is Canadian for a woolen hat just like those on the fabric.
Here is what I made:
The technique used will yield two mug rugs, that you can whip up in a few hours. I like that!
First of all, I got the idea for the mug rug from the cover of Amanda's book, Modern Holiday. I've wanted to make that quilt for EVER. This book turned me onto fresh Christmas colours.
I've made free-form cut triangles before, along with several other shapes, thanks to Karla Alexander's Stack a New Deck book, so I figured I could do this without any paper-piecing or templates.
So let the games begin, shall we?
Leaning Tree Mug Rugs
Yield: 2 mug rugs 6.5" x 9.5"
Fabric Requirements
8 fat quarters in coordinating colours, or scraps, but note that the scraps need to be about 8.5" square for the large tree block.
Mini Trees
1. Cut four rectangles approximately 4.5" wide by 3.5" tall.
**Note that you will make four tree parts at once by stacking these four squares and making two slices with your rotary cutter. If that worries you, then you may do two trees at a time, but you will need to keep the partners together since this is freely cut without templates.
2. Place your ruler at a tree angle you like and slice through all four layers at once.
**Don't make these angles too sharp, or you will not have enough fabric to square to 3.5" in the end.
3. Now make a second slice to form the tree shape. Be sure to allow at least a 1/2" from the side edges.
4. Take the top tree and place it on the bottom of the tree stack. This shuffles the fabrics.
Piecing
1. First sew the left side of the tree to the background. Note that things won't line up perfectly; trim the extra bit of fabric as shown below, so you have a straight edge. Press to the background.
2. Now sew the background piece to the right side of the tree. Press to the background. Trim the bottom edge straight. Square this unit to approximately 3" tall by 3.5" wide.
**Tip: ensure you have 0.5" or more about the tree top. Make four.
3. Sew a 1" x 1.25" rectangle of tree trunk fabric between two 1.25" x 1.75" rectangles of background fabric. Press to the background fabric. Make four. You now have this:
Note that the tree section wasn't trimmed when I took this photo.
4. Sew the trunk unit to the tree unit. Press the seam open or to one side. Square the mini tree blocks to 3.5". Set aside.
Large trees
1. Cut a 7.5" x 6" rectangle of background fabric and the same of tree fabric. Place the tree fabric atop the background having the 7.5" width at the lower edge. Cut a tree triangle shape as you did for the mini trees.
2. Stitch and press as you did for the mini trees. Trim the bottom edge straight. Square the large tree unit to approximately 5.5" tall by 6.5" wide. Make two.
3. Sew a 1.75" x 1.25" trunk piece between two 1.75" x 3.25" rectangles of background fabric. Make two of these units. This unit will measure 6.75" x 1.75"; you will trim it to fit the tree unit after joining.
4. Join the tree unit to the trunk unit. Trim so that it measures 6.5" square.
You now have the following:
Assembly
Arrange these so that you have one large tree with two mini trees on one side as in the first photo of this post. Sew the two mini trees together, one above the other. Then sew this unit to the side of the large tree block. Square to 6.5" x 9.5".
Layer with batting (great to use up scraps) and a backing piece cut approximately 7" x 10". Quilt. I had fun with my metallic threads, Holoshimmer by Sulky, and the most perfect variegated Sulky rayon. I also used Aurifil 2600 in the white/grey areas, and pieced everything on my 1947 Featherweight with pale blue Gütermann.
Both were quilted on my Bernina. I did swirls, echoes, pebbles, dot to dot, a loops and snowflakes meander, and flowing lines. Fun!
When done quilting, square it up and bind. I did a single-fold binding, cut at 1.25" wide, applied to the back, and then top-stitched down to the front.
Here's the back:
My impatiens are hanging onto summer as much as I am!
I used the mittens and toques fabric on one, and the pale green fabric I used for the tree trunks on the other.
I got my Angela Walters cup out (fitting because I pulled out her Shape By Shape 2 for inspiration) to see how it went with these:
I'd say pretty fine! Turquoise is such a beautiful colour.
How would you like to win a few fat quarters of these fabrics for yourself? Maybe make this mug rug or one of the others on the hop this week? If you'd like to see all the fabrics (there are 25!) in Amanda's collection, and read about her designs, click here.
To keep costs down, Benartex is sending to US residents only please. Just answer this question: have you ever made a mug rug and do you use it? Followers, new ones welcome, can get a second entry if you tell me how you follow me. See the top of my sidebar for where to find me beneath my profile. Due to the large volume of comments during giveaways, I won't be responding to comments. Be sure to leave your address in your comment if you are a no-reply blogger, like this: ephdra (at) gmail (dot) com. Thank you for your understanding while I work my way through comments on the last two posts; things have been pretty hectic and stressful at my house this past 10 days. My previous post explains why.
Good luck!
The giveaway is open through Friday, Oct. 20 11:59 EDT. I'll announce the winner on my blog on Saturday. GIVEAWAY HAS NOW CLOSED.
Sunday! (just been rather preoccupied with a very ill doggie, sorry): The winner is #70, Abbigail, and she has been contacted. She uses mug rugs all the time. ☕
Thank you to all who entered, and commented, and welcome to new followers. I've been using one of my mug rugs all week! I find they are perfect for the morning coffee or afternoon tea when I am having something small to eat. If you make one of these, please send me a photo and with your permission, I'd love to post it on my blog.