
This week we just have four blocks to make, those on the light background.
Follow the instructions for making the hearts on dark background in this post BUT be sure to reverse the ombré so that these blocks start with the darkest fabric (Fabric F) at the top and fade to the lightest (Fabric A) in the sixth or bottom strip.
Here is my Winter Blues heart block on light background,

and for the Glowing Hearts version.


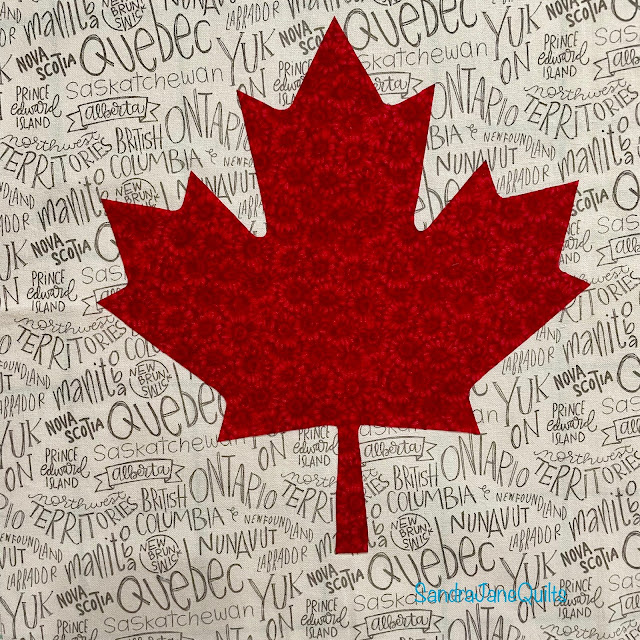
If you are making the Glowing Hearts version, this week you will also need to make the maple leaf block that goes in the centre. Print and cut out the maple leaf template and then follow instructions for the method you use to appliqué it to the 12.5" light background square. I used the Crafted Appliqué method as invented and written about by Lara Buccella in her book of the same name. Stitch Witchery, Steam-a-Seam or any other method you use for raw edge appliqué is fine.
 |
| Peeling off the paper |
Mark the centre of the square by folding it in half one way and gently finger-pressing along the fold. Open it up, fold it in half the other way and finger-press. Do the same with the maple leaf along the horizontal axis; the vertical axis is obvious with the point at the top of the leaf and the stem at the bottom. Once you are happy with its placement, appliqué the cut-out maple leaf onto the background square, and then set the block aside. I am going to do the stitching around my maple leaf once the quilt is sandwiched.


I wanted to give a little plug for one of my sponsors, Leanne, at Devoted Quilter. She released a new pattern this week: it's so pretty, uses my favourite colour, and is photographed by the ocean in the beautiful province of Newfoundland.

This is Spin and Sparkle, and doesn't it just! You can pick up the pattern in her shop by clicking the links, which take you to her blog, so you can see more of the quilt, and purchase the pattern through her site.
And--
You can get the pattern as part of your membership if you join her exclusive sewing group, Stash Artists. Click those links to find out more, and get on the waitlist, because doors open to join just a few times per year, and I hear that next week they will be opening.🥁🥁
Do any of you have a membership in an exclusive sewing group/community? I've considered joining Libs Elliott's, but haven't yet. She just came back from an amazing trip to Japan, and is hosting a trip later this fall!
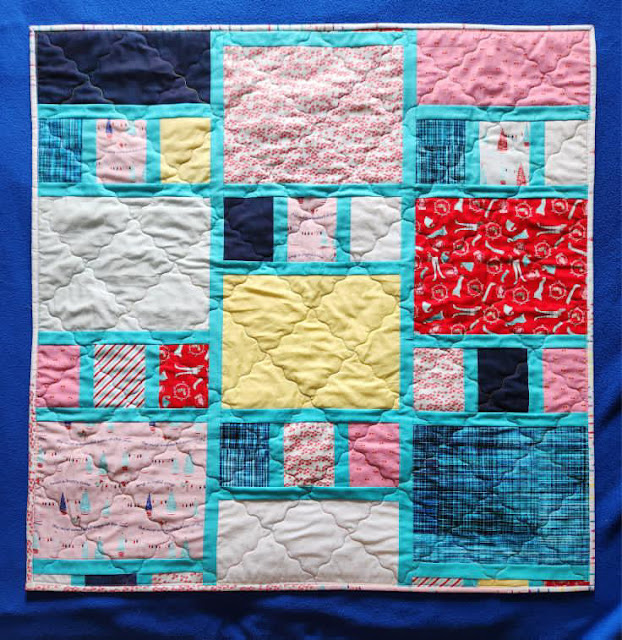
Next week we'll assemble the top. Here's what speedy Deb in New York did, (she purchased the pattern so she can sew ahead, quilter ADHD, ha, and I hear she's onto her second one!) She used another same size baby quilt she'd made but never had quilted as the back for this one. It's a 'two-fer'! Two quilts in one. 😉 The same fabrics appear on both sides, so it was kismet!


Isn't that great?!
Until next week, happy stitching!
It's always fun to see the different fabric combinations during a quilt along. The only draw back is it gives one too many ideas for that next project.
ReplyDeletehave to love those who finish so quick!! Love it
ReplyDeleteDeb's version is lovely - such fun happy color! How perfect that she had another coordinating quilt top that could become the backing, too. I'm sewing away on my hearts!
ReplyDeleteOk, one task in my bedroom...and than I am on to the cutting...this is making me crazy that I haven't done anything on it yet.
ReplyDelete