Showing posts with label bag tutorials. Show all posts

Sunday, September 11, 2016

Rounded Edge Bag #2!

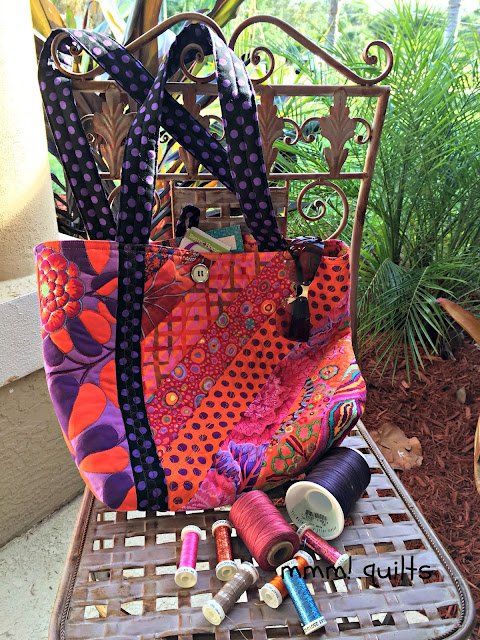
This is another rendition of my Rounded Edge Bag tutorial here, that was also featured on Totally Tutorials. :-)  By the time you are reading this post, it is in the hands of a very good friend of mine.
It has bias binding piping in the sideseams to give it a bit of a pop.  I'll show you how to make the bias piping in a moment.

This bag happened because a sweet quilty friend of mine, Tish, of Tish's Adventures in Wonderland, sent me a bundle of fat eighths of Gooseberry by Bonnie and Camille, just because.  She figured I needed some, she said.  I figure she needs some back, and in the form of 3D sewing.  :-)
I had got a mini charm pack of Gooseberry from Fat Quarter Shop on one of their Flash Sales, so I thought I could use what Tish sent me and a bit of the mini charms to create a bag for her using this fabric.  The bag would go in with her mini round robin quilt I had to mail to her.  This is why it took a little bit longer than it should have to get into the mail.

Here's side 2, since each side is a bit different:
I quilted it on my Bernina with my favourite overall floral motif with random leaves.  On the side rectangles, I did Christina Cameli's 'Pragma' motif.  This was a fun design!  I added a bag handle to this because I had forgotten to add one in my green original one, and they are very handy.

You might (or might not) notice I added in a couple charms not from Gooseberry that really worked nicely, an older Daisy Kingdom one, an Art Gallery one, one from Amanda Jean's "Good Neighbors" line, and the buttons, or circles with 3 dots, hmm maybe not buttons, although I do see buttons...

A view of the inside shows you I used a laminated Kona cotton whose colour is absolutely perfect for the lining and a small inside pocket:
Note the label?!
Another darling friend, Lara, of Buzzin Bumble, sent me a chunk of this way cool fabric, two winters ago.  I've used it in a few bags now and just love it.

I quilted the bag with two colours of Essential thread from Connecting Threads. (no affiliation)  How I LOVE their thread!!!  I totally forgot to put the Tea Rose one I used for the dot to dot in the flying geese in the photo, duh! It's a really pretty one too, but not variegated.
The creation of this little bag, which measures 8X10", is just so... I don't know.... ahhhh!!  That gorgeous Ocean Jewels variegated thread is a gift from Preeti of Sew Preeti Quilts, (click there and you will see she, like me, has been making some little bags) sent to me last winter.  Like I have the very best of friends, so thoughtful. :-)

All right if you are still with me, here is how I made my own bias binding to go around the bag. It's a snap.

Lay a ruler (I used my 15" square) with a 45-degree angle line marked on it, having that 45-degree line along the straight edge of the fabric.  Cut.  You will have a large triangle like the one below.

Carefully turn the triangle so the just-cut edge is to the left, and slice off three 1" strips.  You could use the 'cutting backwards' technique I showed you here, so you'd start by slicing off a 3" wide strip, and then moving the ruler back to the 2" line, and finally the 1" line to give you your three strips.
Voilà!  You have your three strips to go around your bag.
Now join the ends as you would a straight of grain binding, but being extra-careful because the bias is mighty stretchy, then press in half, and you have the 1/2" wide bias binding ready to be sewn into the side seam of your bag.  :-)

Linking up with
Cooking Up Quilts
Patchwork Times

Friday, March 4, 2016

Three-Quarter Patch Tote Review

Back in January I got a survey from Craftsy. Among the questions was one that asked if I'd be willing to review a pattern/kit.  Hands (yes, both of them) flew up!  Well, checked the box, okay.  I actually never thought when I started this blog 2.5 years ago that I would get to do something like this.  Happy dance!  First and foremost, Craftsy did send me the pattern and the fabric to make the tote, and I am an affiliate, so there are affiliate links in this post.  My opinions are my own. :-)  The first one is I LOVE THIS BAG!!
http://www.shareasale.com/r.cfm?u=1074126&b=253536&m=29190&afftrack=&urllink=www%2Ecraftsy%2Ecom%2Fsupplies%2Frowan%2Dthree%2Dquarter%2Dpatch%2Dtote%2Dfeaturing%2Dkaffe%2Dfassett%2Dfabric%2F27110
Rowan Three-Quarter Patch Tote

Wednesday, June 10, 2015

I've Been Published!

Yep!  This was one of my personal goals about a year ago, and I'm so happy to say that it has happened.


I first heard of Moda Bakeshop at my guild meeting when a member held up the Herringbone Placemats she'd made.  I went right home and onto the site!  Made these as my first project:

And I've made several others, the Quilted Patchwork Pouch, the Strippy Charm Pouch and the Cake Clutch.

So I had this idea somewhere back in January, played around and wrote it up.  I submitted the idea for the pouch with some photos of the test one I'd made, on February 1.  If you saw me featured on Cynthia's Oh Scrap! Feature post on March 29, you'll recognize this:

Not even 2 days after the tutorial for this little makeup or sewing tools bag was live on my blog, I got an email from Moda Bakeshop saying there had been a technical glitch in their email system and some emails never got sent out.  Did I get the email below? they asked.  Um NO!! It was the acceptance, dated February 9!  I was ecstatic, freaked out, mad, worried, and filled with panic all at once.  I was mainly concerned that they would no longer want the project since I'd posted a tutorial on how to make it on my blog.

Not the case at all! They do not mind one bit if you submit a project you have already shown on your blog!  I know magazines are very particular that you have not shown anything of a project you submit to them.  Not so with Moda.

On their home page, on the right hand side, just under their social media buttons is a button that says "Project Submission".  Click it and fill out the form. The instructions are straightforward. Go for it!


If you click the new button on my sidebar (yeah! That makes me smile when I see it! I just got it sent to me two days ago.) it will take you to the project on the bakeshop.  You can also just click here.

My daughter, Dayna, for whom I made the first one, the purple prototype pouch (got a thing for alliteration, I know it) used it on the Memorial Day weekend when she went away for 4 days. She said she, (and I quote) "LOVED it.  It fit EVERYTHING!"  It is surprisingly roomy despite its narrow base. It measures 11" high and has a 12" zipper across the top.  Having taught French for 30 years, and been in love all my life with all things French, I just had to choose French General's Joyeux Noël line to make the one for Moda.   And, if you choose to make one, from just one Charm Pack, you will have enough to make two pouches.  I like that!

Speaking of "I like that," on one of my blog buddies (we are each in a group of 4, and then in a larger "hive" group of 16 for the New Blogger Hop I'm in)...anyhow, on Eleanor's blog, Cat Approved Quilting (Bella and I love that name; Bella is miffed that it is not the name of my our blog), I saw a terrific tutorial that I was able to put into action last night.  It's for quickly marking the diagonal on a whole bunch of squares that are destined to become HSTs.  Now, one of my two current WIPs (ya, you can snicker, because you know I'm lying...TWO?! snort), I am testing Sea Star for Cheryl of Meadow Mist Designs, and I am faced with making a few hundred of these babies, so when I saw this I was ecstatic.  I tried it out last night, since I haven't finished cutting out all the white ones.  Look!


Try it; I think you'll like it! And if you make a Pyramid Pouch, please send me a picture.  I'd love to see it!

Linking up with Let's Bee Social and WIP!  Hop on over and join the parties. :-)


Saturday, April 4, 2015

Rounded-edge Small Bag Tutorial

When I made the Itty Bitty Knitting Bag to hold my fingerless gloves I was working on, it was about the size of the plastic bag I'd been using.  I soon realized it could have been a bit bigger, and I also knew I wanted to remake it to improve that tutorial.  I have quite a bit of scrap fabric left from my "new bag" so I set to work.

This bag was going to be a rectangular bag sitting on its small side, but it just evolved into a much smarter, wider opening, rectangular bag sitting on its long side.  Flying geese can go sideways or up and down, right?


Sunday, March 29, 2015

Pyramid Pouch Tutorial

Cyndy's blog, Quilting is More Fun Than Housework, is one of, if not the very first blog I ever followed.  Her turquoise, lime and black quilt caught my eye, and I started looking through her blog, and was hooked.  Last year when she started her Scrap-a-Palooza series, I became a serious fan of hers, making six so far, and .... drum roll.... surprise! Here is the start of my 7th:
Scrap-a-Palooza Quilt #8 from August 2014

This will be one of at least two charity quilts I am donating to the seniors' residence across the road from our home in Ontario.  I also signed up to donate another quilt for the Canadian contingent in Hands 2 Help Challenge at Confessions of A Fabric Addict this year.  Of course, it will be a scrap quilt, but that one will be for a child.  As for the Scrap-a-Palooza series, now in its 14th quilt, I just love the ideas Cyndy comes up with for using your scraps, and the great results she gets.

Sunday, March 15, 2015

Itty Bitty...

Knitting Bag!  Bet that wasn't the completion of the title you first thought of!  It started with a plastic bag which didn't quite cut the mustard for carrying around the fingerless gloves I've been working on.  I thought I should make a small bag for this small project, one I usually take in the car on the trips up to Sarasota for yoga twice a week.  I thought it should be scrappy.  I just happened to have a block left over from Scraps of Calm.  That is where it started.  I added a row to make a 16-patch, almost started cutting some 2.5" squares, and then I remembered!  I have a bunch already cut!
Do you see the scrap from the Seashell runner? Lower rh corner

Tuesday, July 1, 2014

Yoga Mat Bag Tutorial

This bag will hold a Manduka Eko 5mm yoga mat.

You will need:
1 yard of your main fabric
1 yard of your lining fabric
a 25X34" rectangle of batting
scraps of batting
36-39" of cording for drawstring
1 grommet 11mm or 7/16"
thread for piecing and thread for quilting

Bag body:
Cut a 25X34" rectangle of both the main and the lining fabrics.
Layer, baste, and quilt as desired.  I divided my bag into sections of roughly 6" square.  I then chose various motifs from Leah Day's Free Motion Quilting project blog, some of Angela Walters' designs from her Dot to Dot Quilting class on Craftsy and a few others out of books I have or designs in my head.

Once your bag body is quilted, trim it to 22 1/2" X 32".  Set it aside.

Bottom:
Cut a 7" diameter circle from your main fabric, your lining fabric and your batting scraps.  Layer, baste and quilt as desired.


Strap:
Double-sided strap where each side is different:
Cut a 34" long strip by 3" of the main as well as of the lining fabric.  Cut (2) scant 2 1/4"X34" strips of batting.  Alternatively, you may just cut one batting strip.  I like the extra cushy-ness of the double layer of batting.

You always wanted to save those long edges of batting after quilting and trimming your quilts, right?  Now you know why!  Straps for bags!!

Sew the main fabric to the lining fabric RST along one long 34" side using a 1/4" seam.

Press so the wrong sides are now together.  Press 1/4" fold along both 34" sides of the strap.
Open out and lay the 2 batting strips on the lining fabric so their edges are well within the seams and folded edges of the strap.
Fold over the main fabric.  Pin.
I know everyone is crazy about the Clover mini-clips, but I prefer these oh-so-fine pins.  AND I can sew (slowly) over them!
 Edgestitch along both 34" edges.  I stitched right along the edge, and again 1/4" away.

I stitched right down the middle of the strap and then quilted wavy lines the length of the strap to hold all the layers together.  here you see the 3 components besides the main body of the bag:


Sew the bag together along the long edges, right sides together with a 1/4" seam.  I zigzagged the edges after stitching.  You could use a serger here.  Alternatively, you could bind this seam so your bag is reversible.

Feed the strap inside the bag, which is still wrong side out, and baste the strap to the bottom of the bag, using a 1/4" seam and centering the strap over the side seam you just sewed.  If you are making your bag reversible, apply a second strap to the opposite side of the bag from this strap, attaching it to the lining side.

Attach the bottom.
Fold the bottom circle in half, marking the edges with a pin.  Refold, lining up the 2 pins and mark the new edges with pins or press lightly in all four places.  This quarters your bottom so you will have it placed evenly inside the cylinder of the yoga mat bag.


Flatten the bag now, with the side seam at one side.  Put a pin in the opposing side to the side seam.  Open the bag and refold, matching that pin to the side seam and flatten again.  Drop a pin in each of the opposite sides here so you now have the bottom quartered as well.

Insert the circle that is the bag bottom inside the cylinder, matching up all 4 pins.  Stitch in a 1/4" seam, zigzagging as you did the side seam, or using a serger here if you prefer, or binding if you are doing a reversible bag. You would want to use bias binding around this circular seam.

Binding the top edge
Turn the bag right side out.  Baste the top edge of the strap to the top edge of the bag, using a 1/4" seam.  Cut a piece of either the lining or the main fabric that is 2 1/4" X 28".  Fold this strip in half lengthwise, wrong sides together, and press.  Bind the top edge of the bag as you would a quilt,

either machine or hand-stitching the binding to the inside of the bag.

Turn down the top edge of the bag 1 1/2" to make the casing and press.  Open it back out, and fold the bag in half having the strap at one side.  Mark the opposite side from the strap with a dot.  Apply your grommet here as per instructions on the package.

Fold back down the casing and stitch it down, stitching along the edge of the binding.  Be sure to match your bobbin thread to the main fabric so this stitching blends into the bag.

Thread your cord through the grommet hole and knot the ends.  I chose to feed it through before I stitched down the casing.  If you do this, be sure the cording is at the top folded edge of the casing so you won't stitch through it.


Pocket
Cut a 5X71/4" rectangle of your lining fabric.  Fold one long edge over 1/4" and then fold it down once more 3/4".  Press and stitch it down.  Fold the pocket in half, RST, and stitch down the 5" side and across the bottom.  Turn right side out and press.

I sewed my pocket by edge-stitching it just under the binding edge of the casing, centering it over the side seam.


This will be a perfect place for me to keep my phone and car keys during class.

And voilà!  A yoga mat totebag!


Note: For another, different yoga bag, I downloaded Amy Butler's free Nigella Yoga Bag pattern here.  I had thought to adapt that pattern using my quilted fabric as the material, but it wasn't big enough for my mat, didn't have an inside pocket, didn't close at the top, and wasn't reversible, as I'd originally intended.  On my bag, you could bind the side seam, and the bottom seam, as I did the top edge, as well as sew on a strap to the lining side, so it would be reversible.  My inside fabric is so pretty, but the quilting doesn't show, which is why I opted not to do a reversible bag after all.  Maybe one day!