Are you ready?! We just have to make one giant nine-patch and two borders, and we will have our quilt top! I am loving the fabrics and colours I am seeing on Instagram. Thank you all for joining in with another QAL. Let's get to it!

1. The first thing to do is make the giant 9-patch. I wonder how many of you went ahead and did it?! Place the four 8.5" (12.5") BG squares in the four corners, the pop star units between them and the centre star unit in the centre. Sew the units into rows and the rows together as you do for a 9-patch. Here is mine.

2. There are two borders. The first has the final star points for the pop stars in it.
For the baby:
Sew one navy/BG geese between two 2.5" x 14.5" rectangles; press to the rectangles. Make two. Sew on to either side of the quilt. Repeat with the 2.5" x 16.5" rectangles and navy/BG flying geese. Sew one to the top and the other to the bottom of your quilt. Press open or to the borders.
For the throw:
You may be able to get the 21.5" border rectangles from one WOF strip. My BG fabric is just shy of 44" wide, so I was able to. If not, then sew five 3.5" strips together to make one long strip, using mitred seams, and pressing those seams open or to one side. Use this long strip to cut the eight rectangles needed for this border. Follow the baby directions but substitute those rectangles with four 3.5" x 21.5" rectangles for the first two border units, (sew to either side of the quilt centre) and then four 3.5" x 24.5" for the second two (sew to top and bottom).

3. Final borders
For the baby:
You have four WOF strips remaining. Cut two 2.5" x 36.5" strips (or whatever your quilt measures from top to bottom edges) and sew them to either side of the quilt centre. Then cut two 2.5" x 40.5" (or whatever your quilt measures from side to side) and sew them to the top and bottom of your quilt. The quilt should be 40.5" square.
For the throw:
Sew the six remaining 3.5" strips together to make one long strip. Sew them to your quilt centre as for the baby quilt, using 3.5" x 54.5" strips for the sides and 3.5" x 60.5" strips for the top and bottom. The quilt should be 60.5" square.

Now you have one whole month, that is until June 15, to get your top together and quilt it! The parade of finishes opens on that auspicious day in June when a famous Canadian was born in a little town just north of Edmonton, Alberta: my dad.
“How do I quilt it?” is one of, if not the, most asked questions in the quilting world. For the baby quilt, I quilted a flowing meander of loopy flowers (I love quilting them; go here for a quick tutorial), spiral flowers, leaves and loops across the entire quilt. I did some stitch in the ditch around the large green star to stabilize the quilt. A little dot-to-dot made the centre star pop.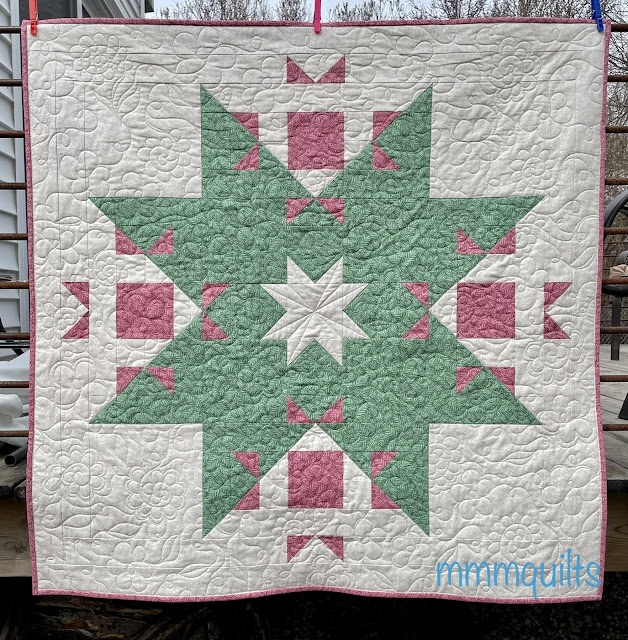

Remember to post your progress in the #popstarquiltalong hashtag. I've also been using #popstarquilt even though there are at least three various Pop Star quilts within it! The first tag is the one I check regularly. There are some absolutely fabulous versions that may tempt a few of you who have been just watching! They call me the great mmm-nabler, woo-ooh, woo-ooh! Uh oh, I feel an ear worm coming on! If you don't do Instagram, send me an email and I'll post it for you. The link up on June 15 is for finished tops or finished quilts. I'm really hoping for a lot of finished quilts (I don't want to add more UFOs to the world ha) so that's why you've got four and a half weeks.😉
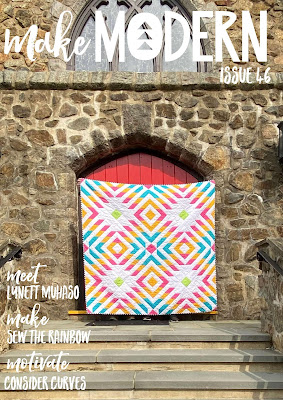
Did you catch the latest issue of Make Modern (affiliate link) that came out on Friday? It's another good one (aren't they all?!)
The last of my sponsor features is Cindy of Stitchin at Home. Cindy and I met during the new bloggers hop way back in 2014 I believe. We actually have met up in person twice; we only live a couple hours' drive apart. Cindy has an Etsy shop, and a blog, and is a very talented designer and free-motion quilter. She designs the block of the month quilt for her guild, and she has been published in Make Modern and for Island Batik as well. I made one of her designs for an Island Batik challenge when I was an ambassador.

Happy stitching, and I'll see you on June 15, if not before, for the final parade of quilts!
Thanks for the shout out Sandra!
ReplyDeleteLooks great. Still not sure if I make the deadline, new cast on June 7….maybe upstairs to sew then…but I am guessing it will be a week or two after that….but I will finish it promptly as it is going to my guild for Hands2Help…a little late…but the guild gives the benefit quilts out in the fall at our show.
ReplyDeleteI'm getting there slowly with my two & hope to have at least one quilted & maybe bound. Best get myself into gear. Oh & BTW, have you ever heard of the book called "The Muddle-Headed Wombat by Ruth Park, a children's book I read as a child. I thought of it as I read your post. Take care & hugs.
ReplyDeleteThis was a fun quilt to make! I'll be posting about it tomorrow!
ReplyDeleteThese Pop Stars are lovely!
ReplyDeleteI'm ready for the link up. My top is pieced!! Thanks for another great QAL.
ReplyDelete