
The downside is that that require a little more work in the prep stage to make them. I know there are lots of rulers out there to make the 'little more work', much less, but here is a tutorial I wrote for the size I needed in my current quilt, which is 2X4" finished.
I would first like to credit Kirsty at Bonjour Quilts whose HRT tutorial popped up when I searched for a handy-dandy chart, and she has just such a handy-dandy chart for both HRTs and HSTs, so pop over and check it out, download it and then come back. I will wait, as they say...
All right, welcome back! Without further ado, here we go.
Note that this tutorial is for a 2X4" finished HRT and will yield you two of these babies, both with matching, not contrasting, diagonal seams. See above. Always nice to see the end result and then find out how to get there right?!
HRT Tutorial without rulers or paper-piecing
1. Cut two rectangles, one from each colour, that measure 3X6". All you do for that math, and this is thanks to Kirsty, is add 1" to the width and 2" to the height of your finished desired unit.Therefore, 2X4" is 2 + 1 = 3 and 4 + 2 = 6. (this works for any size of rectangle that is a 1:2 ratio, so for a 3X6" finished HRT, you'd start with two rectangles, 4 X 8". If you are doing pointier HRTs, go to Kirsty's post!)
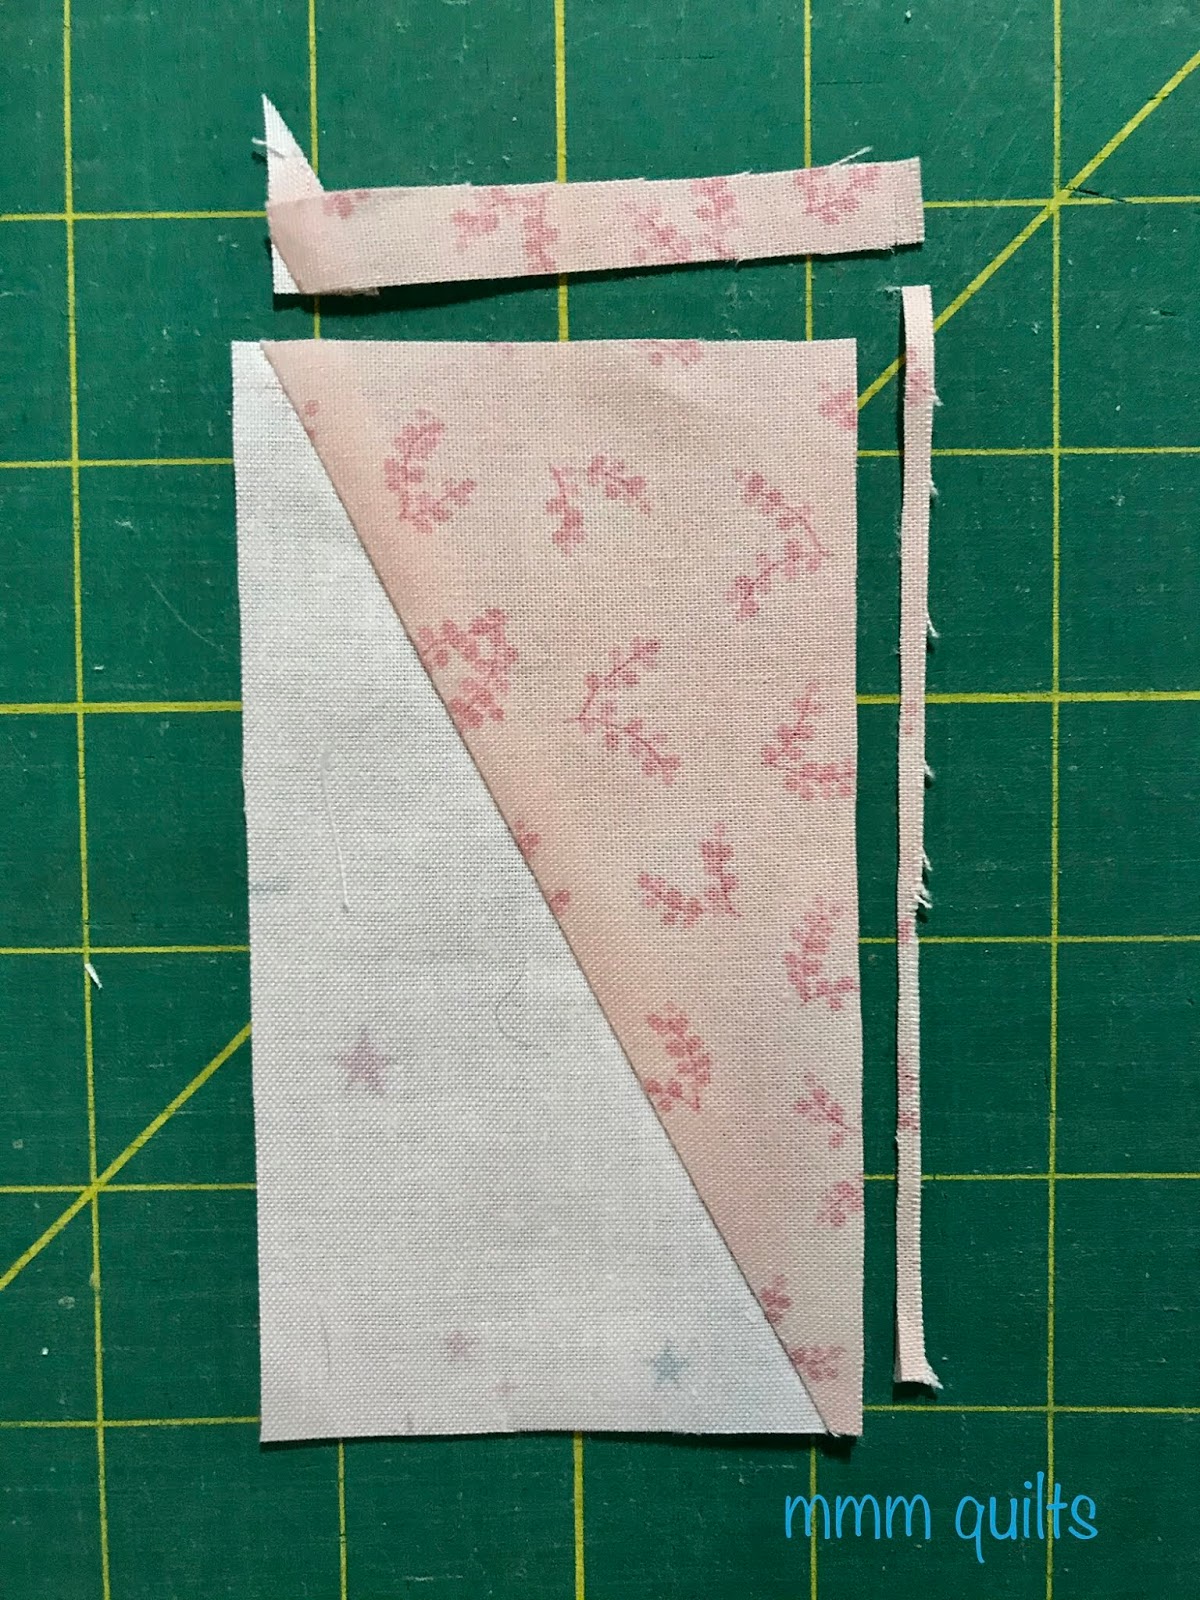
2. Stack the two fabric right sides up, very important, on your cutting mat. Cut from the lower left to the upper right if you want finished units going in that direction. For units going in the opposite direction, cut in the opposite direction, lower right to upper left. Easy.
You will have the following four half rectangles below. Each one of the four is a triangle, right? Hence the name HRT, half rectangle triangle.

3. Pair a white with a pink. Flip one on top of the other, so they are now right sides together, with the pointy points of each triangle extending about 1/4" beyond the straight edge of its partner. This offsetting is very important.

4. Sew a 1/4" seam, being sure to sew right through that 1/4" intersection formed by the pointy points' overlap.

5. Squaring up is where the extra care comes in. For a finished 2 x 4" HRT, I need to square the unit to 2.5 X 4.5". Set your ruler on the HRT having the 2.25" dot on the seam at the top, and the 4.25" dot on the opposite diagonal seam.

6. Turn the HRT around, and repeat what you just did, lining up the dots at 2.25" and 4.25". The sides you just trimmed should lie nicely under the 2.5 X 4.5" lines. Trim again.

7. Of special note is that the diagonal seam will NOT run right through the corner, but it will be slightly offset as you see in the photo below.

Lovely!
That section right there has sparked another quilt design idea... Like that books saying goes, "so many designs, so little time!"
I hope this tutorial helps you explore using more HRTs in your quilts. I also hope to have my current quilt finish for you on Friday!
Good Morning Sandra! I just PINned a pattern yesterday that included HRTs. Unbelievable that you shared this tutorial today, and I love that it doesn't require any special tools. Thank you, my friend. I'm guessing this might just spark a few projects that will mean squirrels will be running my way. ~smile~ Roseanne
ReplyDeleteThanks for the nice tutorial. I have made them similar to you, but for some reason I tend to paper piece them more.
ReplyDeleteThis is helpful, thanks! I need to go to Kristy's site too; that chart will be handy!
ReplyDeleteWonderful tutorial, Sandra....very easy to understand and the formula is easy to remember! Headed over to BonjourQuilts right now. Hope you're nice and warm...it was 16 F. on my front porch this morning here in southeastern WV.....brrrrrrr....and we have a few more days until it's officially winter!
ReplyDeleteThank you for a very easy tutorial. There's a lot of things you could make with a scrappy set of HRTs.
ReplyDeleteVery nice tute! Looking forward to seeing what you make with those pretty HRTs :)
ReplyDeleteOh, that makes so much sense. I wish I'd had this a few months ago when trying to make a pattern that needed these - thr instructions were either wrong or not clear to me and the points all got wonky. Thankfully it was for a baby quilt and looked okay anyways, but I've been quilting long enough to "know better". I'm going to save this for next time - thanks for sharing!
ReplyDeleteI just saw a pattern made of HRT. Now I can't wait to receive the pattern and see their method and play.
ReplyDeleteVery useful explanation and demonstration, thanks.
ReplyDeleteGreat tute! I have never had much doing them that way, but you have nailed it.
ReplyDeleteI found Kristy's tutorial and chart earlier this year and love it. Actually have two projects going using it. Looking forward to seeing your project;)
ReplyDeleteI appreciate this tute, and love the quilt! Made from the 'heart'!
ReplyDeleteThanks for this. Great explanation!
ReplyDeleteI just made a ton of HRTs and used that technique. I drew a line on my ruler from the two points to make it a little easier for me to line up.
ReplyDelete