My last finish was Soar, and in the making of it, I had a bit of an epiphany when I realized that the backing would make the most perfect multi-colour bright binding. I had enough to actual cut binding strips, but it was late, and I was tired, so I knew enough to tell myself I'd trim the quilt and cut the binding in the morning when I'd be fresh.
Well my brain chugged along through the night and early morning like the little train that could, and I ended up having a lightbulb moment when I thought, 'why not try binding the quilt as I do some placemats, by carefully (that is key!) trimming the batting only, with scissors, and then trimming the backing beyond the edges of the quilt, folding it under twice and topstitching it down onto the front! I've never done a big quilt this way, though I've used the technique on several placemats. I couldn't for the life of me remember how to get the mitred corners, but eventually, it all came back.
So here, for future reference of placemats, minis, wallhangings, or quilts, is what I did.
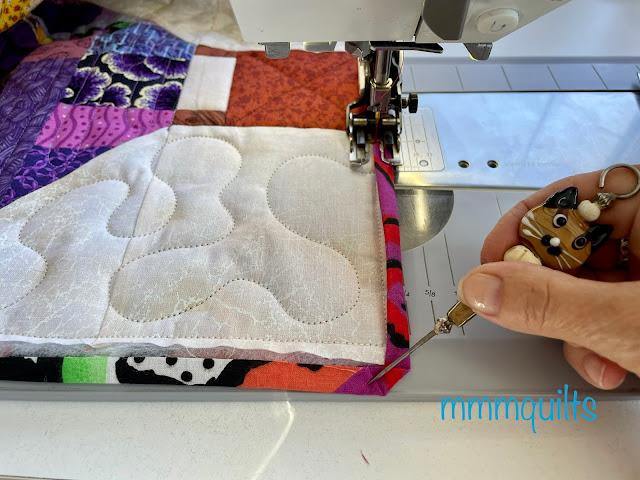
1. Trim the backing to extend beyond the quilt top by about 3/4”. I like a 2 1/4" binding, and this allows for a little extra to go around the bulk of the quilt sandwich. Press the raw edge under 1/4” and then press again. Topstitch close to the fold, stopping about 4” from the corner.
 |
| Note my trusty helper, Bella, well her 'Avatar' as made for me by my friend Rose! I actually use this little tool a lot to help guide fabric under the presser foot, or demo something for the blog. |
2. Fold the corner over onto the next raw edge, making a triangle shape. This will form the mitre.
5. Continue topstitching around the edge. I like to sew in my satin label on the back of a quilt, but doing it this way means you have no back side of a binding edge. I simply tucked the label into the lower corner and it is just fine!
I do this on placemats, but it would work for runners, minis, and, as you see, it worked fine for a large quilt!
Edited: I received an email from a blog reader in Saskatchewan, Helen K, who said that she uses a nifty tool called the Quick Easy Mitred Binding tool.
 |
| Contact info is right on the tool |
Linking up


I've done this on some small projects and always get stuck at the mitered corner. Thanks for showing how you do it, Sandra!
ReplyDeleteGreat idea! Did you leave your basting stitches in around the edge of your quilt? I usually baste the edges with four stitches per inch.
ReplyDeleteOk... the little cat pokey tool toy thing... love!
ReplyDeleteI never get that mitered corner when I try to do this. Great job!
ReplyDeleteBrilliant! Thank you Sandra. I have some quilt tops in the pipeline for quilting and this will do nicely to finish a couple of them.
ReplyDeleteThank you!! I am working on a bed runner and wasn’t looking forward to the binding and your idea and tutorial helped me want to finish it this way! Deb
ReplyDeleteI love this tutorial and the photos were so helpful! I'll try to remember this the next time I'm doing one of those baby quilts.
ReplyDeleteI have tried several times to use the backing as binding, but most times I end up mistakenly trimming the backing! groan! Your comment about trimming it carefully is so key! I never thought to trim with scissors! That will definitely help me!
ReplyDeletePerfect timing (again :-) ) I took a quilt along to my quilting group last night to get advise on how to quilt it and someone suggested I used the backing as the binding - now I have the perfect tutorial to help me do it. Thank you.
ReplyDeleteExcellent tutorial, Sandra! Thanks sew much!
ReplyDeleteThank you Sandra & better than my "old" method done on my first ever quilt 44 years ago. I also cut binding at 2 1/4" & think it's fine although others tell me it is wrong & should be 2 1/2". Your tutorial is great. Take care & hugs.
ReplyDeleteHi Sandra! That is the cutest stiletto I've ever seen. Adorbs! Now, back to reading the tut. Thank you for sharing your process! Thanks for adding this to Kathleen's monthly tutorials and tips. I'm waiting for the houses - I know you're working on them! {{Hugs}} a bunch, my friend! ~smile~ Roseanne
ReplyDeleteThank you for the great tutorial and the linkup! It is handy to know how to do this the right way, because sometimes using the back as the binding is just the right thing. The stilleto is one of my favorites when I am at the machine…a great tool.
ReplyDeleteIf you have the perfect backing, using it as the binding is a great idea! Thank you for showing us how you do it :-)
ReplyDelete